H2 Headline for title on two lines of text
(Optional) H5 subhead text
(Optional) Paragraph copy: Lorem ipsum dolor sit amet, consectetur adipiscing elit. Pellentesque porta rhoncus dapibus. Duis molestie neque porta, convallis diam vitae, mollis quam. Nulla et rutrum eros. Sed mi metus, volutpat sed leo et, pellentesque venenatis tellus. Phasellus in imperdiet felis.
Enable Q2 Marketplace
-
Log into Q2 Central
-
Navigate to “User Management” > “Groups”
-
Choose the group you would like to enable Marketplace for
-
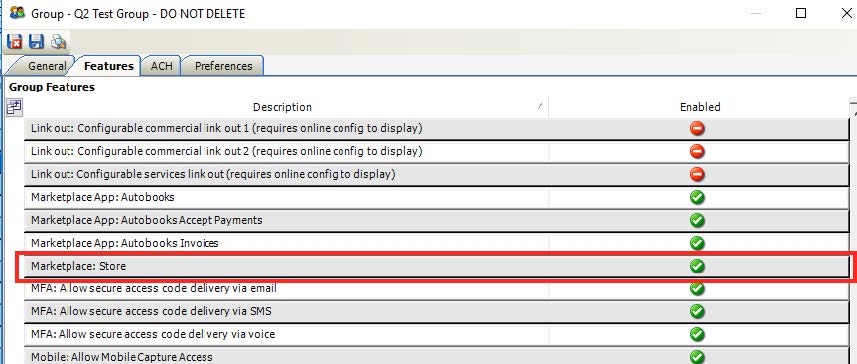
Select the “Features” tab
-
Enable the entitlement called “Marketplace: Store”
-
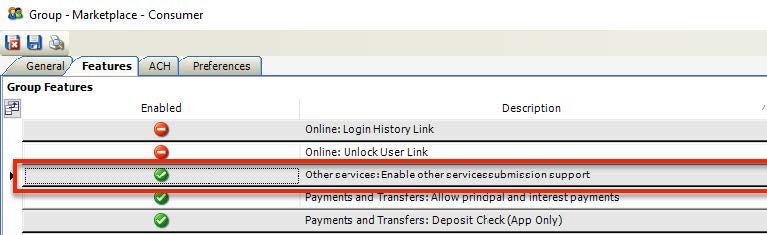
Enable the entitlement called “Other services: Enable other services submissions support”
-
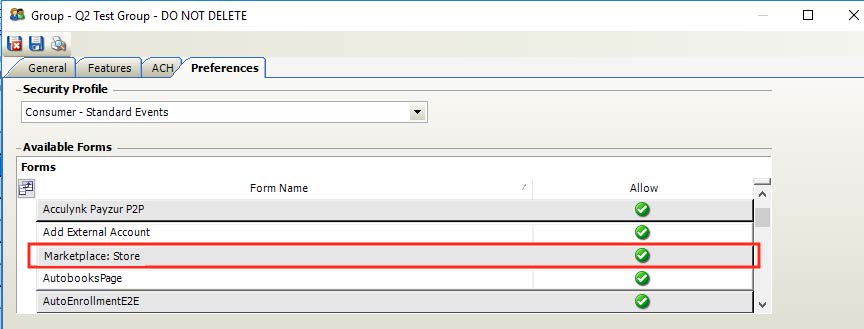
Select the “Preferences” tab
-
Enable the form called “Marketplace: Store”
Enable Autobooks App(s)
-
Log into Q2 Central
-
Navigate to “User Management” > “Groups”
-
Choose the group you would like to enable Marketplace for
-
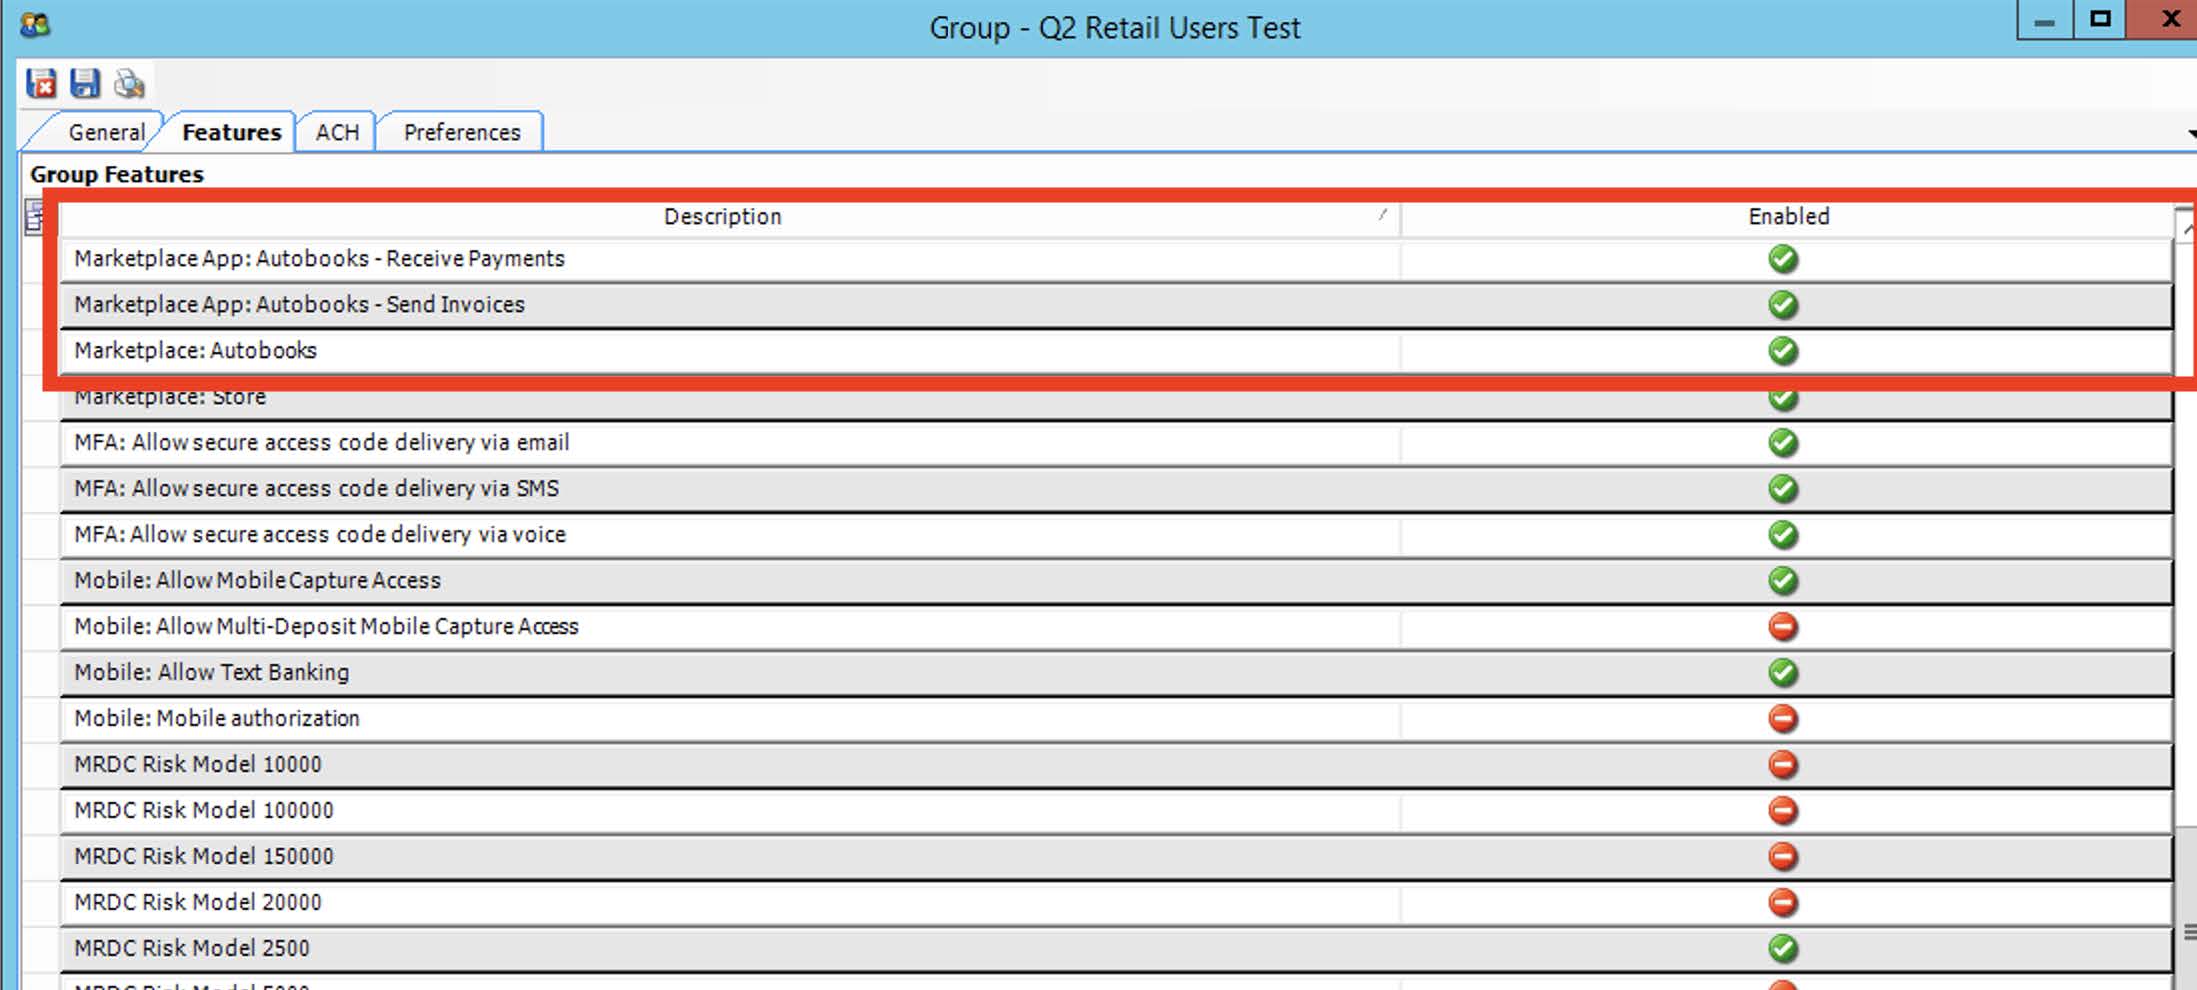
Select the “Features” tab
- Enable the entitlements for the Autobooks app
- “Marketplace App: Autobooks”
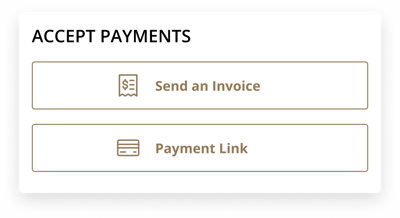
- “Marketplace App: Autobooks - Send Invoices”
- “Marketplace App: Autobooks - Receive Payments”
- Select the “Preferences” tab
- Enable the form called “AutobooksPage”
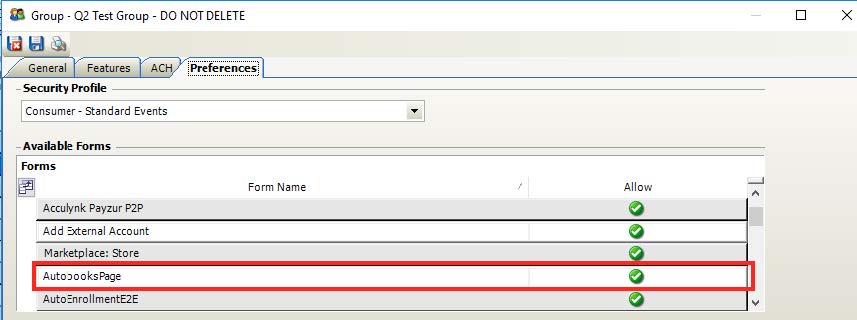
Note: Enabling the “AutobooksPage” form entitlement also enables the Autobooks widget on the online banking Account Overview page.
Enable Autobooks App(s)
-
Log into Q2 Central
-
Navigate to “User Management” > “Groups”
-
Choose the group you would like to enable the solution for
-
Select the “Features” tab
-
Enable the entitlement for the Autobooks app “Autobooks – Invoice and Receive Payments”
-
Select the “Preferences” tab
-
Enable the form called “AutobooksPage”
Note: Enabling the “AutobooksPage” form entitlement also enables the Autobooks widget on the online banking Account Overview page.