H2 Headline for title on two lines of text
(Optional) H5 subhead text
(Optional) Paragraph copy: Lorem ipsum dolor sit amet, consectetur adipiscing elit. Pellentesque porta rhoncus dapibus. Duis molestie neque porta, convallis diam vitae, mollis quam. Nulla et rutrum eros. Sed mi metus, volutpat sed leo et, pellentesque venenatis tellus. Phasellus in imperdiet felis.
Setup & Configuration
What's offered?
All Q2 customers can offer the Autobooks invoicing and payment form modules to provide their small business customers:
- No monthly subscription cost
- 3.49% processing fee for CC/DC 1% for ACH
Additionally, financial institutions with access to the Q2 Marketplace can also give their small business customers the option to upgrade their subscription:
- $9.99 a month
- 3.49% processing fee for CC/DC 1% for ACH
- This provides your small business customers with additional features:
- Dashboard: Projecting cashflow and monitor payments
- Accounting: Track and categorize expenses
- Automated Reporting: Easily access profit and loss statements, sales tax reports, and more
How to Configure Autobooks
The steps to set up Autobooks features varies depending on whether your financial institution has licensing for the Q2 Partner Marketplace. Follow the steps on the guide that applies to your financial institution:
Autobooks Entitlement Guide for Q2 Marketplace Customers
Entitlements for all Q2 Marketplace apps are controlled at the group level within central. There are 2 main steps when turning on Autobooks for end users within the Q2 Marketplace.
Enable Q2 Marketplace
-
Log into Q2 Central
-
Navigate to “User Management” > “Groups”
-
Choose the group you would like to enable Marketplace for
-
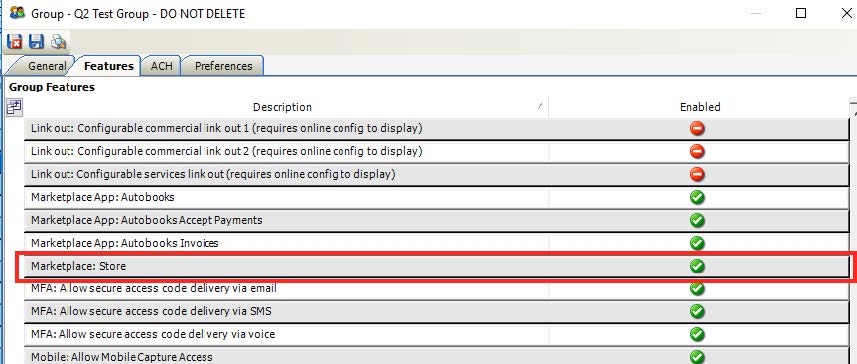
Select the “Features” tab
-
Enable the entitlement called “Marketplace: Store”
-
Enable the entitlement called “Other services: Enable other services submissions support”

-
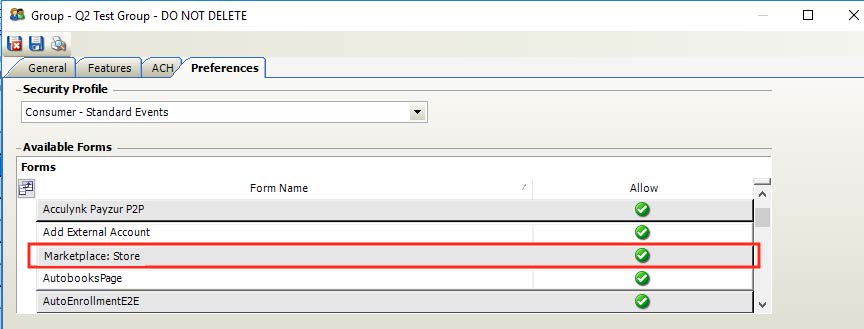
Select the “Preferences” tab
-
Enable the form called “Marketplace: Store”
Enable Autobooks App(s)
-
Log into Q2 Central
-
Navigate to “User Management” > “Groups”
-
Choose the group you would like to enable Marketplace for
-
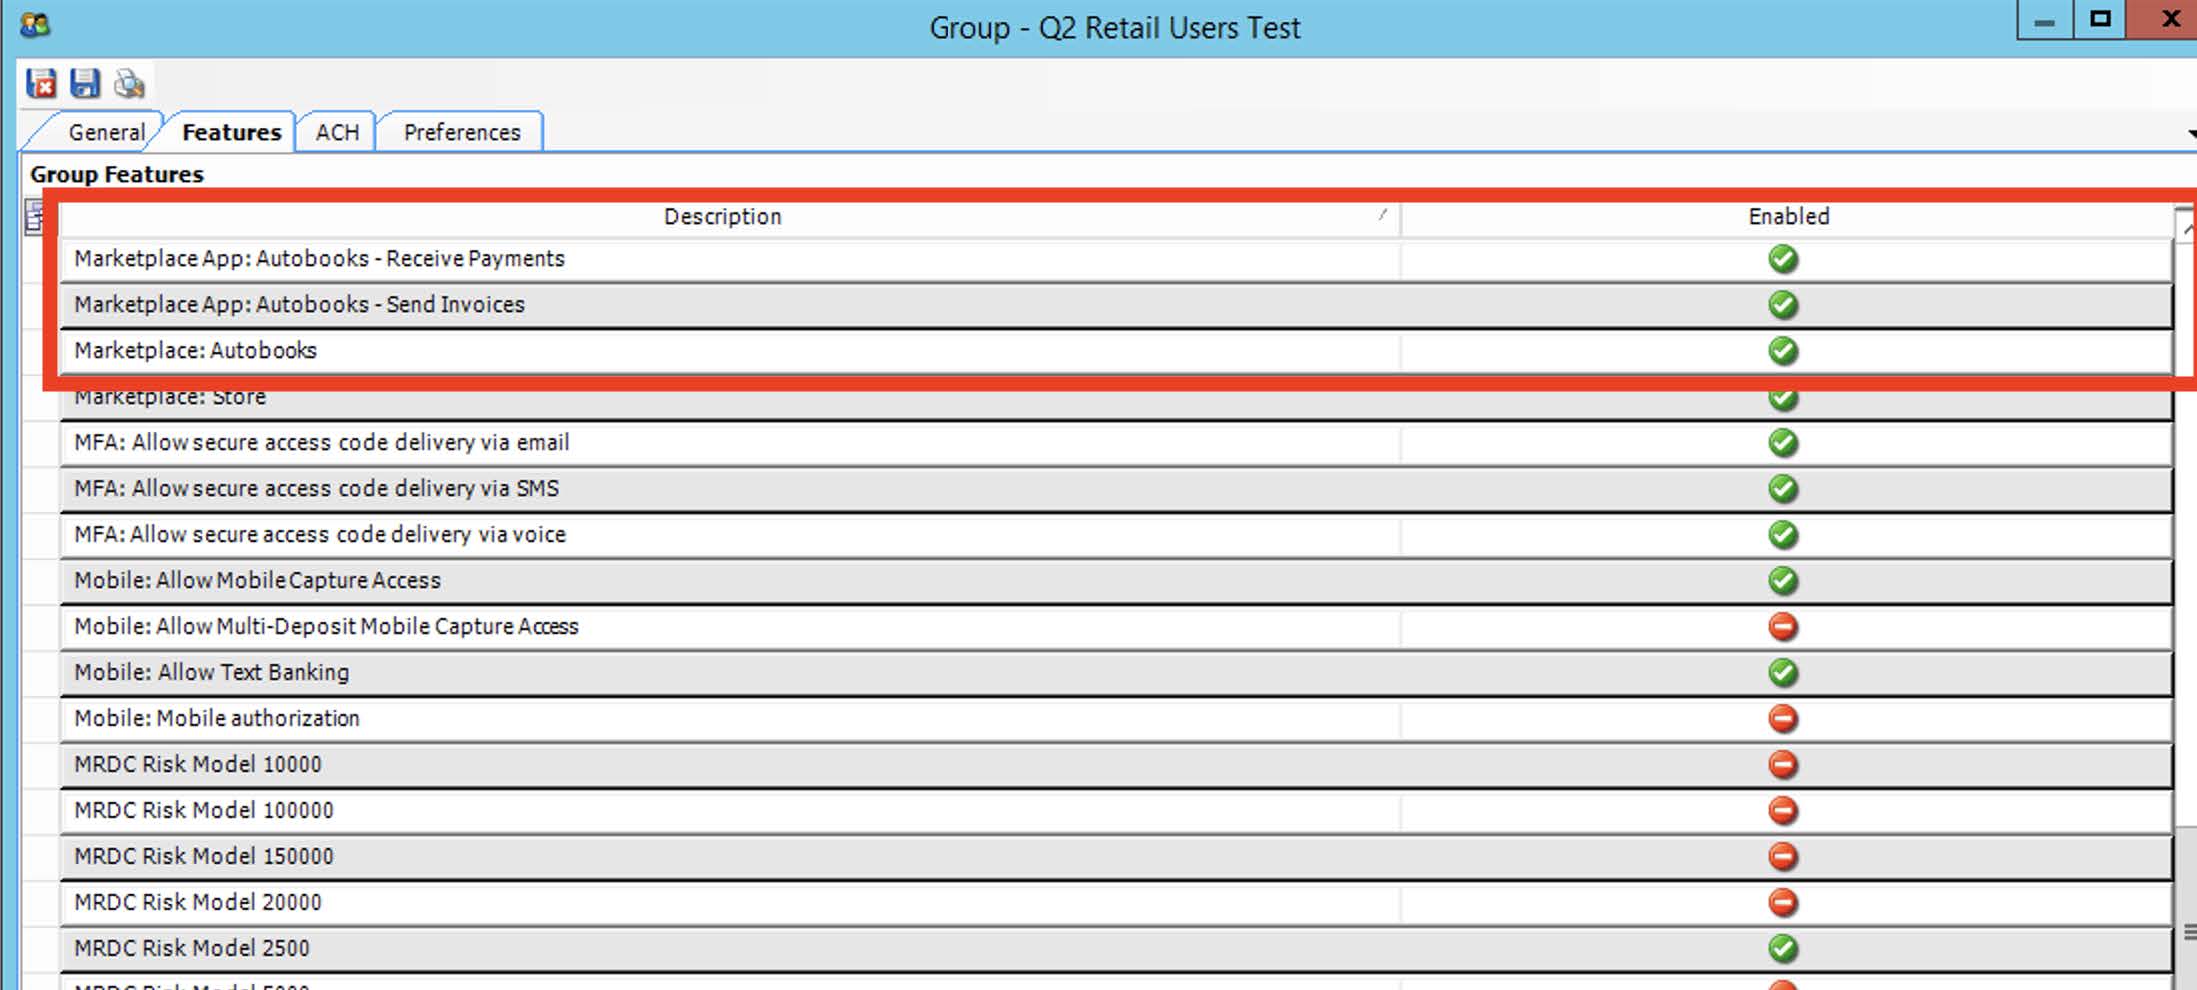
Select the “Features” tab
- Enable the entitlements for the Autobooks app
- “Marketplace App: Autobooks”
- “Marketplace App: Autobooks - Send Invoices”
- “Marketplace App: Autobooks - Receive Payments”
- Select the “Preferences” tab
- Enable the form called “AutobooksPage”
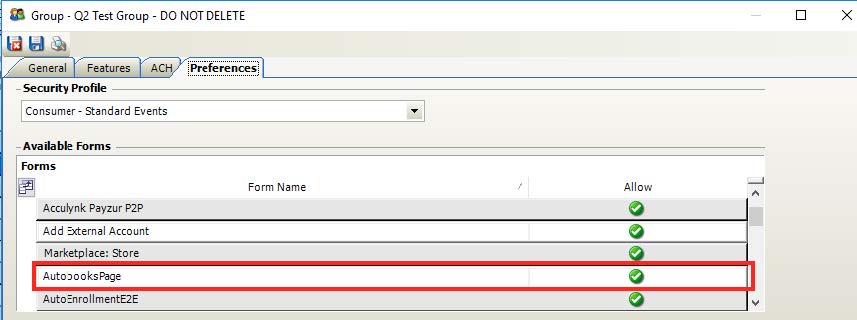
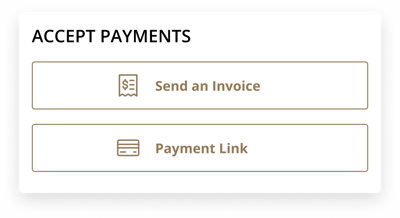
Note: Enabling the “AutobooksPage” form entitlement also enables the Autobooks widget on the online banking Account Overview page.
Autobooks Entitlement Guide:
Invoice & Payment Form Only
Entitlements for the Invoicing & Payment Form are controlled at the group level within Q2 Central. Follow the instructions below to enable the Autobooks app, “Autobooks – Invoice and Receive Payments:”
Enable Autobooks App(s)
-
Log into Q2 Central
-
Navigate to “User Management” > “Groups”
-
Choose the group you would like to enable the solution for
-
Select the “Features” tab
-
Enable the entitlement for the Autobooks app “Autobooks – Invoice and Receive Payments”
-
Select the “Preferences” tab
-
Enable the form called “AutobooksPage”

Note: Enabling the “AutobooksPage” form entitlement also enables the Autobooks widget on the online banking Account Overview page.