H2 Headline for title on two lines of text
(Optional) H5 subhead text
(Optional) Paragraph copy: Lorem ipsum dolor sit amet, consectetur adipiscing elit. Pellentesque porta rhoncus dapibus. Duis molestie neque porta, convallis diam vitae, mollis quam. Nulla et rutrum eros. Sed mi metus, volutpat sed leo et, pellentesque venenatis tellus. Phasellus in imperdiet felis.
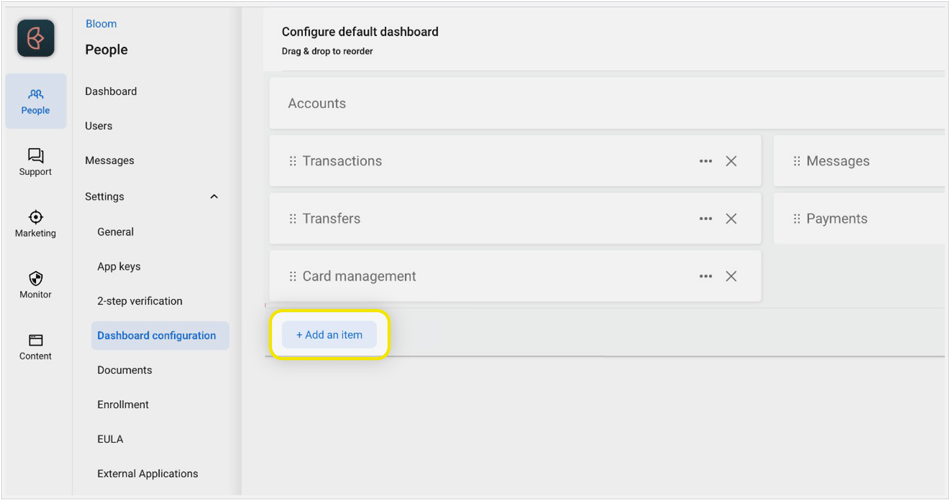
Configure & add the Autobooks plugin to the default dashboard
- In Banno People, navigate to “Dashboard configuration” under “Settings”
- Click the "Add an Item" button
- Select the “Accept Online Payments” plugin from the list
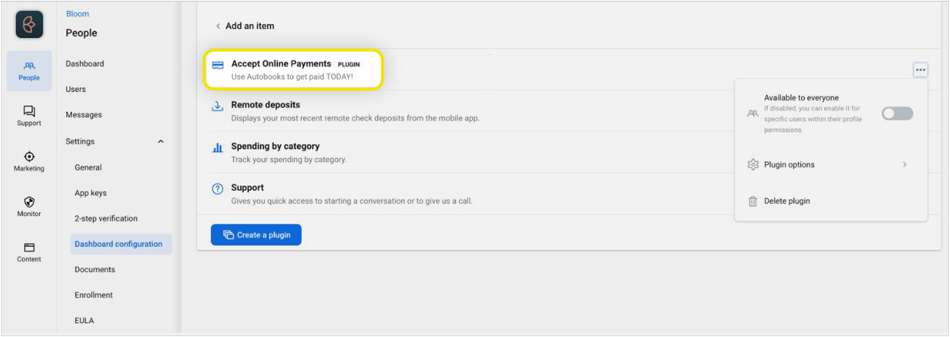
After selecting the plugin, you will automatically return to the default dashboard page. You will see the “Accept Online Payments” dashboard card appear in your list.
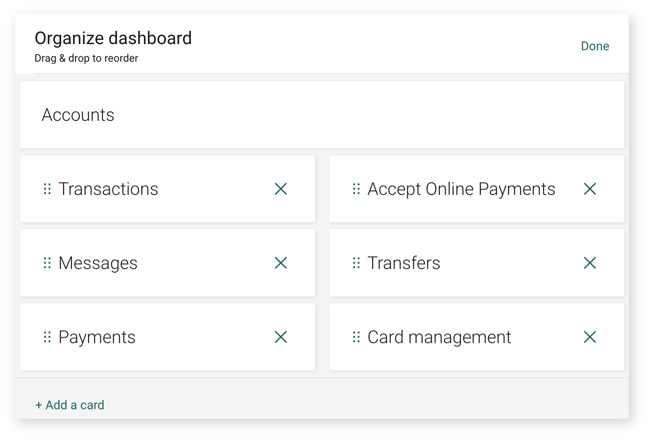
- Next, drag your “Accept Online Payments” dashboard card to the top left or right corner.
- Click “Save” in the top right to complete this step.
Enable the plugin for a test user account
- Now that the plugin is configured, choose the Banno user account you will use for plugin testing
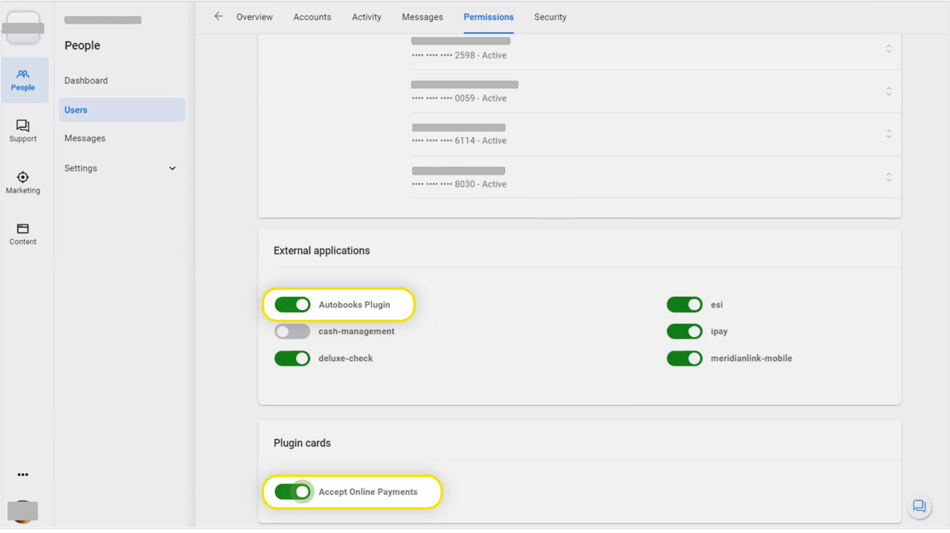
- In Banno People, navigate to “Users” > “Find User” > “Permissions” > “External Applications”
- Under “External applications,” enable “Autobooks Plugin” by toggling it to green
- Under “Plugin cards,” enable "Accept Online Payments" by toggling it to green
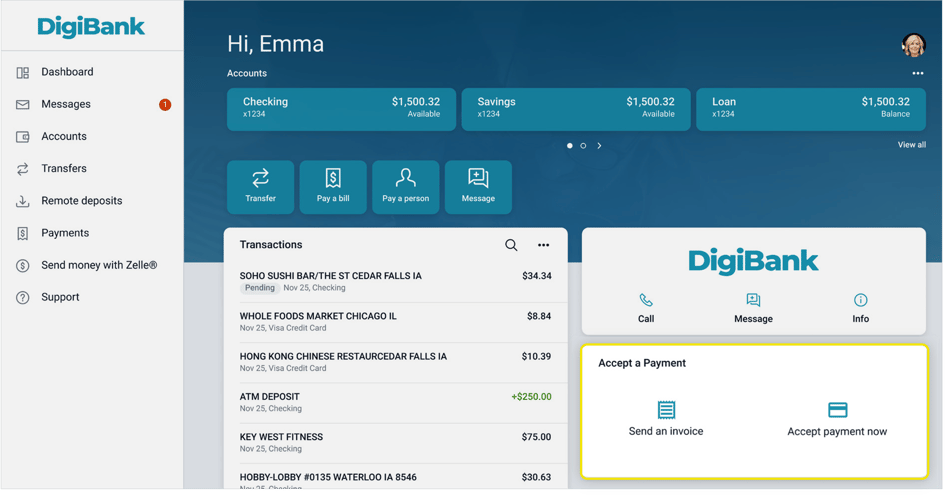
Initiate the Send an Invoice or Accept Payment dashboard card for the test user to enroll in Autobooks
- Log into Banno Online or Banno Mobile
- Select either plugin to begin enrollment and to submit the enrollment data
Note: if the enrollee has multiple valid transactional checking accounts, they will be presented with the option to select where they want their funds. If only one account exists, the system will default to that checking account and require the enrollee to accept the EULA.
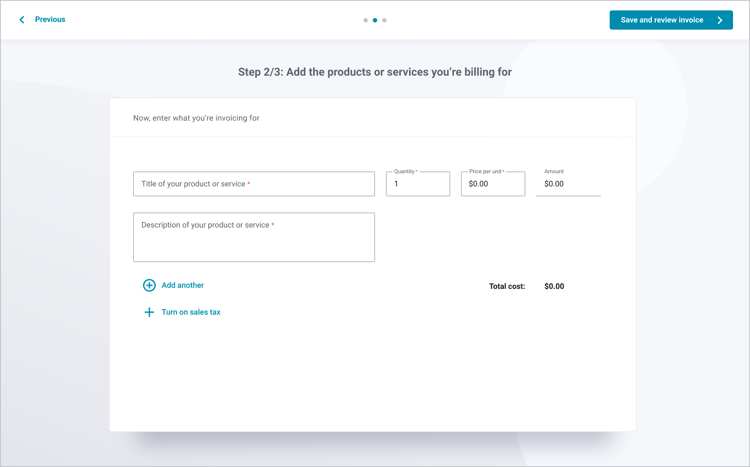
Enroll your test user to accept payments & send their first invoice
-
After submitting the enrollment data, if you use actual/live data from a personal or business account, the test account will be verified by the Autobooks merchant enrollment APIs or merchant enrollment team.
-
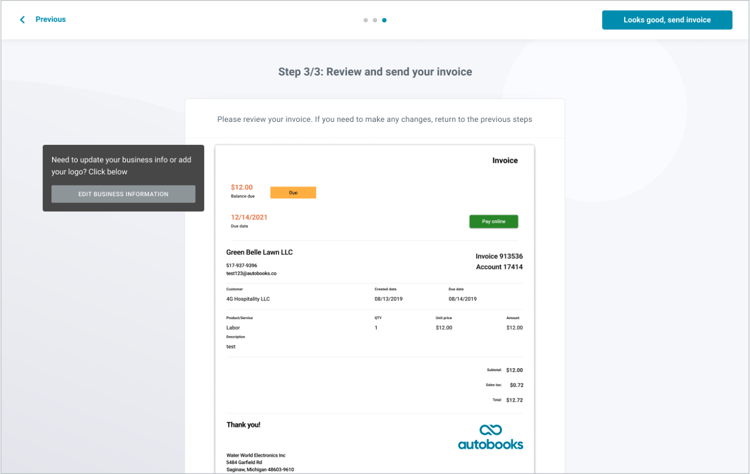
Next, you’ll be able to use the plugins. Below is what the user will see as they walk through sending their first invoice.